
Michael Weinstein
EntrepreneurMichael Weinstein is a seasoned writer and a dedicated expert in work safety, footwear, and popular shoe brands. With years of research and expertise, he's...Read more
Michael Weinstein
EntrepreneurMichael Weinstein is a seasoned writer and a dedicated expert in work safety, footwear, and popular shoe brands. With years of research and expertise, he's...Read more
Are your little one’s Skechers Twinkle Toes shoes losing their sparkle? Don’t worry; it might be time for a battery replacement. These shoes feature a unique light-up design that requires a battery to function properly. In this guide, we will walk you through the steps to replace the battery on Skechers Twinkle Toes shoes, so your child can continue to enjoy their light-up shoes. Let’s get started!
How to Replace Battery on Skechers Twinkle Toes Shoes?
Skechers Twinkle Toes shoes are known for their flashy and sparkly designs that kids love. These shoes come with a unique feature – lights that blink with every step. The lights on Skechers Twinkle Toes shoes are powered by a battery, and if the battery runs out, it’s time for a replacement. In this article, we’ll walk you through the process of replacing the battery in Skechers Twinkle Toes shoes.
Step 1: Gather the Required Tools
Before you start with the battery replacement process, you need to have the required tools. You’ll need a small Phillips screwdriver, a new CR2032 battery, and a clean, flat surface to work on. Make sure the surface is well-lit, and you have enough space to work comfortably.
Tools Required:
- Small Phillips screwdriver
- New CR2032 battery
- Clean, flat surface to work on
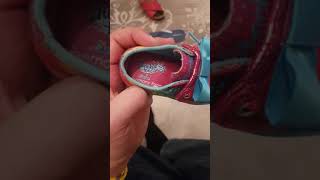
Step 2: Remove the Battery Cover
The battery cover is located on the bottom of the shoe, near the heel. Use the Phillips screwdriver to remove the screws that hold the battery cover in place. Once you remove the screws, gently lift the battery cover off the shoe.
Step 3: Remove the Old Battery
Once you remove the battery cover, you’ll see the old battery. Use your fingers or a small screwdriver to gently pry the battery out of its holder. Be careful not to damage the holder or any of the wires connected to the battery.
Step 4: Insert the New Battery
Take the new CR2032 battery and insert it into the holder, making sure that the positive (+) side is facing up. Gently press the battery down until it snaps into place.
Step 5: Replace the Battery Cover
Once you’ve inserted the new battery, it’s time to replace the battery cover. Align the cover with the screw holes and gently press it down until it snaps into place. Use the Phillips screwdriver to tighten the screws and secure the battery cover in place.
Benefits of Replacing the Battery on Skechers Twinkle Toes Shoes
Replacing the battery on Skechers Twinkle Toes shoes is a simple process that can save you money and time. Instead of buying a new pair of shoes, you can simply replace the battery and enjoy the twinkling lights once again. This process is also eco-friendly, as it reduces the amount of waste that goes into landfills.
Replacing the Battery on Skechers Twinkle Toes Shoes vs. Buying a New Pair
Buying a new pair of Skechers Twinkle Toes shoes can be expensive, especially if your child has grown out of their current size. By replacing the battery, you can extend the life of the shoes and save money. Plus, your child will love seeing the twinkling lights again.
Frequently Asked Questions
Here are some commonly asked questions about replacing the battery on Skechers Twinkle Toes shoes:
What type of battery do Skechers Twinkle Toes shoes use?
Skechers Twinkle Toes shoes use a CR2032 lithium coin cell battery. This type of battery is easily found at most electronics stores and online retailers.
It’s important to note that you should always replace the battery with one of the same type and voltage to ensure proper functioning of the shoe’s light-up feature.
How do I access the battery compartment on my Skechers Twinkle Toes shoes?
The battery compartment on Skechers Twinkle Toes shoes is usually located on the outer side of the shoe, near the sole. Look for a small panel that can be easily opened with a screwdriver or coin. Once the panel is opened, you can access the battery compartment.
It’s important to be gentle when opening the panel to avoid damaging the shoe or breaking the panel. Take care not to lose any screws or small parts that may be released when you open the panel.
How do I remove the old battery from my Skechers Twinkle Toes shoes?
Once you have accessed the battery compartment, you should be able to see the battery inside. Carefully remove the old battery by gently prying it out of the compartment with your fingers or a small tool.
Be sure to dispose of the old battery properly by recycling it or taking it to a battery drop-off location. Do not throw it in the trash.
How do I insert the new battery into my Skechers Twinkle Toes shoes?
Insert the new battery into the compartment with the positive (+) side facing up. You may need to gently press the battery down to ensure it is securely in place.
Once the new battery is inserted, replace the panel and screws. Test the light-up feature to make sure the new battery is working properly.
What should I do if the light-up feature on my Skechers Twinkle Toes shoes still isn’t working after replacing the battery?
If the light-up feature on your Skechers Twinkle Toes shoes still isn’t working after replacing the battery, there may be an issue with the shoe’s wiring or circuit board. Contact Skechers customer service for assistance with repairing or replacing your shoes.
It’s important to never attempt to repair or modify the shoe’s electronic components yourself, as this could cause damage to the shoe or pose a safety hazard.
How To Fix Your Light Up Sketchers Shoes Twinkle Toes
So, replacing the battery on your Skechers Twinkle Toes shoes is an easy task that you can do at home. With just a few simple steps, you can have your shoes twinkling once again.
Remember to always use the correct battery size and follow the manufacturer’s instructions carefully. This will ensure that your shoes continue to work properly and look their best.
Don’t let a dead battery keep you from enjoying your Twinkle Toes shoes. With these simple steps, you can keep the twinkle in your step and shine bright wherever you go.
Conclusion
Replacing the battery on Skechers Twinkle Toes shoes is a simple process that can be done at home with just a few tools. By following these steps, you can extend the life of your child’s shoes and save money at the same time. Remember to dispose of the old battery properly and recycle it if possible.
Recent Posts
Understanding that over 2 million Americans are affected by plantar fasciitis each year highlights the significance of proper footwear. The pain and discomfort caused by this condition can derail...
Have you ever wondered why so many runners experience injuries every year? A staggering 79% of recreational runners get injured, and a major culprit is often the wrong choice of running shoes. It's...