
Michael Weinstein
EntrepreneurMichael Weinstein is a seasoned writer and a dedicated expert in work safety, footwear, and popular shoe brands. With years of research and expertise, he's...Read more
Michael Weinstein
EntrepreneurMichael Weinstein is a seasoned writer and a dedicated expert in work safety, footwear, and popular shoe brands. With years of research and expertise, he's...Read more
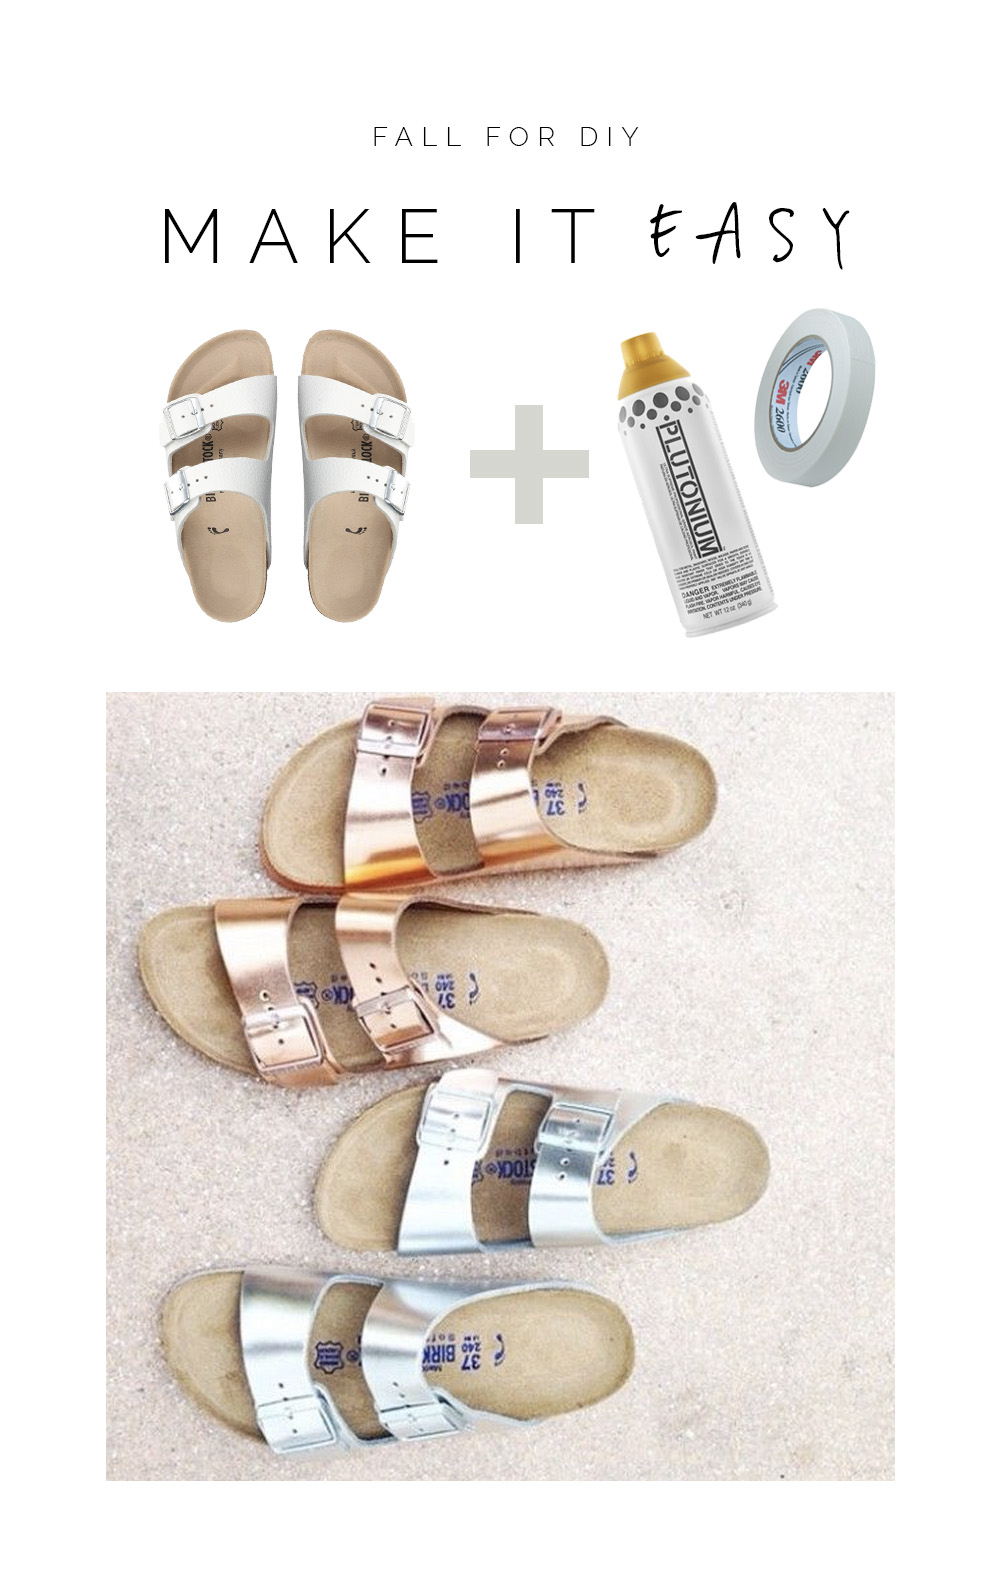
Birkenstocks are a staple in many wardrobes, but sometimes you just want to give them a new look. Painting your Birkenstocks is a fun and creative way to refresh your footwear without breaking the bank. With a few simple steps, you can transform your old Birks into a one-of-a-kind fashion statement.
- Clean your Birkenstocks: Before painting, clean your shoes with a damp cloth and let them dry completely.
- Choose your paint: Acrylic leather paint is the best choice for Birkenstocks. Choose a color that you like and that will compliment your wardrobe.
- Apply the paint: Use a small paintbrush to apply the paint in thin, even coats. Let each coat dry completely before applying the next one.
- Seal the paint: Once you’re happy with the coverage, use a sealant to protect the paint from wearing off too quickly.
How to Paint Your Birkenstocks?
Are you tired of the same old Birkenstock sandals that you have been wearing for years? Do you want to add a pop of color or a unique design to your Birkenstocks? Painting your Birkenstocks is a fun and easy way to breathe new life into your old sandals. Here’s a step-by-step guide on how to paint your Birkenstocks.
Materials Needed
Before you start painting your Birkenstocks, make sure you have all the necessary materials. You will need:
- Cotton swabs
- Painter’s tape
- Acrylic paint
- Paint brushes
- Clear sealant spray
Step-by-Step Guide
- Step 1: Clean your Birkenstocks with soap and water and let them dry completely.
- Step 2: Use painter’s tape to cover any parts of your Birkenstocks that you do not want to paint. This includes the soles, footbed, and any metal buckles.
- Step 3: Choose your desired paint colors and begin painting your Birkenstocks. Start with a thin layer of paint and let it dry completely before applying a second coat.
- Step 4: Once you have finished painting your Birkenstocks, let them dry for at least 24 hours.
- Step 5: Apply a clear sealant spray to protect the paint and make it more durable.
Benefits of Painting Your Birkenstocks
Painting your Birkenstocks allows you to customize your sandals and give them a unique look that reflects your personal style. It’s also a great way to extend the life of your Birkenstocks and make them look brand new again.
Painting Your Birkenstocks vs. Buying New Ones
While buying a new pair of Birkenstocks may seem like a good idea, it can be expensive and wasteful. Painting your Birkenstocks not only saves you money, but it also gives you the opportunity to get creative and make a one-of-a-kind pair of sandals.
So, painting your Birkenstocks is a fun and easy DIY project that can breathe new life into your old sandals. With the right materials and a little bit of creativity, you can transform your Birkenstocks into a unique and stylish pair of sandals that you can be proud to wear.
Frequently Asked Questions
Here are some common questions about painting Birkenstocks:
What materials do I need to paint my Birkenstocks?
Before you begin painting your Birkenstocks, you’ll need to gather some supplies. Here are the materials you’ll need:
- Acrylic paint
- Paintbrushes
- Painter’s tape
- Newspaper or a drop cloth
- Sealer (optional)
Make sure you choose acrylic paint that is suitable for leather or fabric. You may also want to use a sealer to protect your design from wear and tear.
How do I prepare my Birkenstocks for painting?
Before you start painting, you’ll need to clean your Birkenstocks thoroughly. Here’s what you should do:
- Remove any dirt or debris from your Birkenstocks.
- Wipe them down with a damp cloth to remove any remaining dirt or oils.
- Use a leather cleaner or rubbing alcohol to remove any stubborn stains.
- Allow your Birkenstocks to dry completely before painting.
It’s important to start with clean, dry Birkenstocks to ensure that the paint adheres properly.
How do I paint my Birkenstocks?
Once your Birkenstocks are clean and dry, you can start painting. Here’s how:
- Use painter’s tape to cover any parts of your Birkenstocks that you don’t want to paint.
- Apply a thin layer of paint to your Birkenstocks using a paintbrush. Be sure to use smooth, even strokes.
- Allow the paint to dry completely before applying a second coat (if necessary).
- Repeat this process until you achieve the desired look.
Remember to be patient and take your time to ensure that your design looks its best.
How do I protect my painted Birkenstocks?
If you want to protect your painted Birkenstocks from wear and tear, you can use a sealer. Here’s how:
- Make sure your painted Birkenstocks are completely dry.
- Apply a thin layer of sealer using a paintbrush.
- Allow the sealer to dry completely before wearing your Birkenstocks.
- Repeat this process every few months to keep your Birkenstocks looking their best.
Keep in mind that a sealer may slightly alter the appearance of your design, so test it on a small, inconspicuous area first.
Can I remove paint from my Birkenstocks?
If you’re unhappy with your painted Birkenstocks or want to change your design, you may be able to remove the paint. Here are some methods you can try:
- Use rubbing alcohol or nail polish remover to remove small areas of paint.
- Try using a leather cleaner or deglazer to remove larger areas of paint.
- Be gentle and test any products on a small, inconspicuous area first to avoid damaging your Birkenstocks.
Keep in mind that removing paint may also remove any original coloring or finish on your Birkenstocks.
DIY Shoe Painting – Change the Colour of Your Birkenstocks
In short, painting your Birkenstocks can be a fun and creative way to give your old shoes a new life. With just a few simple steps and some basic materials, you can transform your Birks into a unique and personalized fashion statement.
Remember to properly clean and prep your shoes before painting to ensure the best results. Take your time and apply thin, even coats of paint to avoid any streaks or clumps. And don’t be afraid to get creative with your designs and color choices! The possibilities are endless.
Whether you’re looking to revamp your current Birks or create a one-of-a-kind pair from scratch, painting your Birkenstocks is a great way to express your personal style and breathe new life into your footwear collection. So grab your paintbrushes and let your imagination run wild!
Recent Posts
Puma sneakers have different sizing depending on the specific style and model. It's recommended to check the product description or reviews for each sneaker to determine if they run small or large....
How To Lace Puma Shoes? If you're a fan of Puma shoes and want to learn how to lace them, you've come to the right place! Lacing your Puma shoes properly not only adds a stylish touch but also...